Installation
1. Environment
Make sure Laravel is already installed and running. You should already have a valid database connection. This install process works best on a fresh Laravel installation.
2. Install Using Composer
Station should be installed via Composer by requiring the lifeboy/station package in your project’s composer.json.
{
    "require": {
        "lifeboy/station": "dev-master"
    }
}
Then run a composer update
composer update
This assumes you have a working dev or production environment with Laravel 5 and a database already installed and configured.
3. Register Station Within Laravel
To use Station, you must register the provider when bootstrapping your Laravel application.
Find the providers key in app/config/app.php and register the Station Service Provider.
'providers' => array(
    // ... add below ...
    Lifeboy\Station\StationServiceProvider::class,
    Collective\Html\HtmlServiceProvider::class,
),
Also update the aliases key in app/config/app.php
'aliases' => [
    // ...
    'Form' => Collective\Html\FormFacade::class,
    'Html' => Collective\Html\HtmlFacade::class,
],
In app/Http/Kernel.php, update the $routeMiddleware class variable:
protected $routeMiddleware = [
    // ...
    'station.session' => \Lifeboy\Station\Filters\Session::class
];
4. Publish Station’s Assets to Laravel
php artisan vendor:publish
Note
We sometimes see a “path not found” warning on this step. You can safely ignore this.
5. Run Default Migrations
php artisan migrate
6. Set the Administrator Email
In config/packages/lifeboy/station/_app.php set the root_admin_email to your email address.
7. Run Station’s Build Command
This will generate new migrations, run the new migrations, generate models, and seed the database.
php artisan station:build
8. Test Installation
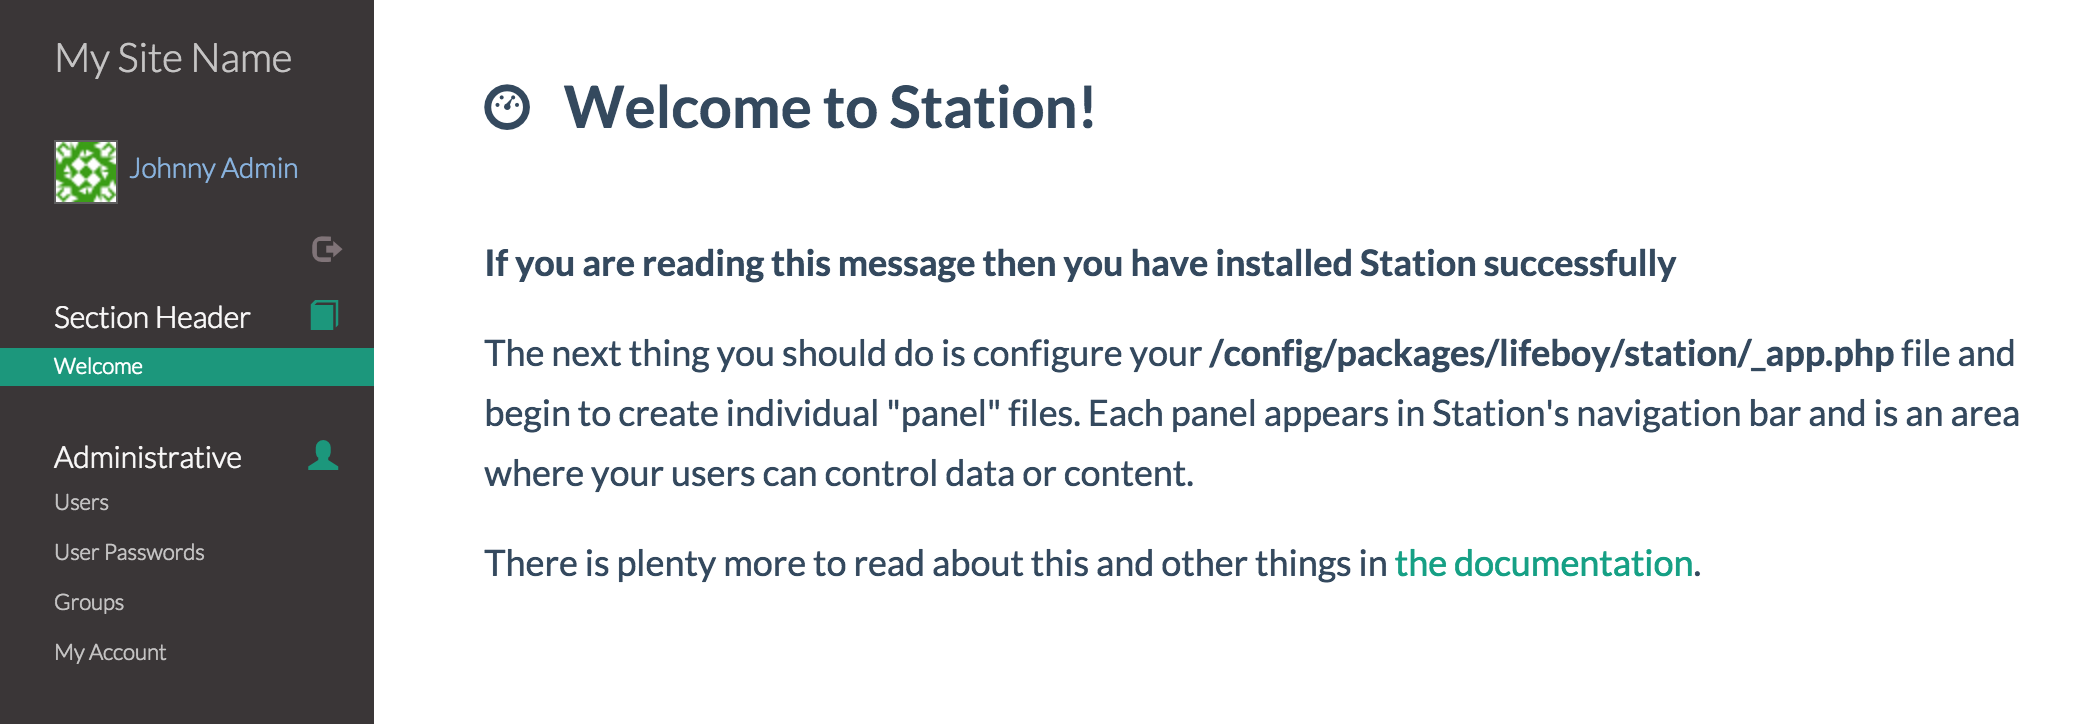
You should now be able to browse to your app at: http://{host}/station/. You can login using user/password: admin/admin. Upon login, you will see a welcome screen:
9. Configure Station and Your Panels!
That’s it! Next you will configure Station and tailor it to the needs of your users.
Note
You will be able to configure and test Station now. However, to run Station in production, please make sure that your email system has been configured and enabled. (See Configuring Emailers for more info).